Friday, December 30, 2016

My Admiral, Ann

I may be the Captain but Ann is the Admiral. I consider myself extremely fortunate that my wife enjoys boating as much as I do. She started boating in high school while I was still in landlocked Ohio. When we met in 1967, I had never been on a boat. In fact, we were boatless (word?) for 15 years until one eventful summer in Maine when we took a daysail on Milky Way, a 40 ft sailboat. After that the die was cast. We went from a 27 ft Coronado to a 38 ft Ericson and finally to a Beneteau 423. Ann manages the helm when docking and anchoring while I handle the lines. Sometimes it takes a little strength to dock and I have as little as anybody (but more than the person at the helm...)

All throughout our time together, Ann has painted in both watercolors and pastels. Our house is like an art gallery which I greatly enjoy. She's a member of Barrett Art center, Kent art Association and the Northeast Watercolor Society. Her work has been accepted for juried shows at Barrett Art Center, Kent Art Association, Northeast Watercolor Society and Hudson River Watercolor Society. She has also served as Juror of Awards at Kent Art Association. Ann’s paintings are in the corporate collections of McCabe and Mack, C. B. Strain and many private collections. She has studied with Mel Stabin, Carlton Plummer, Arne Lindmark, Franklin Alexander, Christine Debrowsky, Linda Novack and Artie Johansen.

She paints landscapes of the Hudson Valley and scenes along the Intracoastal Waterway (ICW). In recent years she has worked mainly in pastels on our boat Fleetwing, a Beneteau 423 sailboat while cruising the last seven years from New York to Key West and back every winter. Ann accepts commissions as well as offering her paintings for private sale.
Contact: 423sail@gmail.com

Samples of her most recent works:


Tropical Sunset  8 x 12
One of the great joys of the ICW are the beautiful sunsets, best viewed from the cockpit while sipping wine. 


3 Palms
You start seeing palms around South Carolina. I have always marveled at how they could be so tall on such a skinny trunk. I guess flexibility is the key. 

Marshland  12 x 16
The marshlands start in South Carolina and continue on to Florida. Passing through such an area you can see boats going in all directions since the passage is very winding.

Autumn  6 x 9
In our backyard in New York we have lots of sugar maples, they have very bright colors in the fall. 

Day's End  11 x 16
We just cannot avoid taking photos of sunsets and Ann likes to paint them in pastels.

Clematis  8 x 16
Another pastel of flowers from our backyard in New York

Marshland #2  8 x 9
Sometimes the water looks inviting for anchoring but you'd better not try, very shallow usually

Storm Brewing  8 x 12
"Red sky at night, sailor's delight, red sky at morning, sailor take warning" For a sunrise, a red sky can predict a storm 

Palm  6 x 9
They are very graceful when they sway in the wind, and it's how they survive storms, they go with the flow. I've seen very few palms uprooted, I currently can't think of even one example in seven years of cruising the ICW. 

Sunset Blues  8 x 6
Not all sunsets are bright red, some are rather subdued but still pleasant to view at anchor

Summer Beauties  12 x 12
We do spend the summer up north and usually cruise Long Island Sound. This is another pastel from our backyard

The Hammock  11 x 17
A hammock is a parcel of land that's slightly higher than the surrounding area, usually a marsh. It's just high enough to allow hardwood trees to keep their roots dry enough to survive. 

Last Light  13 x 20
As the light fades, it's time for dinner down below.

Towards Evening  13 x 17
The sun sets behind trees in our backyard and gives interesting lighting on the hardwoods

Sunset #3  6 x 9
We never tire of the sunsets on the ICW

Maine Rock  11 x 16.5
Before we started cruising the ICW, we spent three summers in Maine. It's our favorite area to sail. It has great places to anchor and the wind is dependable, coming up every day around 11:00 am. The scenery is breathtaking. 

Wahoo River Anchorage  13 x 20
The sunset was so bright it didn't look real. We stared in awe. 

Black-Eyed Susans  8 x 10
From our backyard

Sunset #4  4 x 10
Catching the colors just right is a task. The photo here doesn't do the pastel justice

Last Snow  12 x 16
We used to spend the winters up north but no more. I like the way Ann has the water going back into the pastel, it looks like it's receding. 

Last Light  12 x 16
Ann's farewell pastel on another day on the ICW


Thursday, December 22, 2016

Managing Photos on a Boat


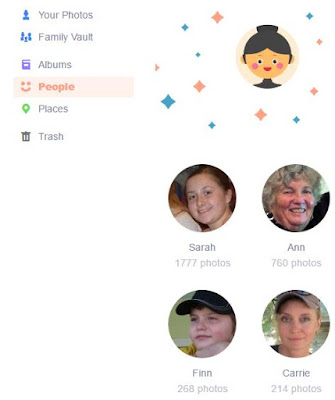
I've selected "People" in the menu and photos appear
of all the faces recognized in my collection, several
dozen, this is just a sample
Aren't digital cameras fun! No more trips to the local photo shop or, worse yet, a mail order developer. But what do you do with all those photos? The digital cameras keep increasing their pixel count resulting in larger and larger file sizes and that's not even counting RAW format which is another whole story of big. Since there are no longer brakes on how many photos you can take, we wind up with a lot of photos. I turned digital in 1996 with the first Kodak camera out, 640 x 480 image size at the time. I'm currently at 102,972 photos using up 196 GB of storage space! How do you keep track of all those photos? I started with good intentions by organizing folders but now I have thousands of folders. One could just resort to a timeline organization but then how do you find that picture of you with your wife dining out? In other words, how can you find the photo you want that you can remember taking but have no idea when or where it's stored in all those folders?

Until recently there was really no good solution to all this unless you wanted to spend hours organizing your photos and tagging them with access words that you could search on. Then the face recognition revolution came to digital photo storage and made all that unnecessary. In fact, it's even better because the automatic recognition catalogs more than just faces. It also recognizes "Things" which consists of images of a long list of non-people objects such as cars, the beach, food, pet, playground, and much more. Add to that the ability to include other people in the search so you can find that picture of you and your oldest grandchild taken at the beach. Select yourself, your grandchild and "beach" and up pops all photos in your collection with all three in the same photo. The real power of the auto recognition is when you start combining selections to narrow the search such as a location (if you're not sure which location that photo was taken at, then select more than one), a person or persons (no limit), which things are in the photo and there can be more than one. For example, I was at either Key West or Marathon, with Matthew and Hoolie was with us by a tree. Up will pop all photos with all three selections in the picture at either Key West or Marathon.

You can also narrow down the search to a time period if you desire. Of course, you have to label each person collection with the name of the person the computer recognized but you only have to do that once for each collection.

If your camera has a GPS chip (e.g., iPhone) then your
photos will automatically be sorted by location too
If all this has your interest then here's what you need:
- A fast internet connection for the initial upload of all your old photos. A 10 Mbps line is fine although I have a 50 Mbps connection to the internet.
- A photo service offering face recognition. There are several out there but they can get expensive. I already belong to Amazon Prime where I get free two day delivery of packages from Amazon for $99/year. The benefits include Prime Music with two million songs available, Prime Video with hundreds of on demand movies and TV shows, and; most importantly, Prime Photos with unlimited storage for all your photos - now with face recognition. Amazon also has apps for the iPad, iPhone and Android devices so you can access and upload from those devices too. Amazon even offers automatic uploading if desired. See Music, Videos, and Photos.

You can choose those photos
that have these "things" in
the same photo along with
other selections
When Amazon Photos first came out it was terrible but eventually Amazon fixed things and now the cloud drive is organized by the same folders you uploaded (it didn't used to be). They have an app you can download to your PC or device that will automatically upload any photo placed in the Amazon Drive folder, it's just like any other folder on your PC. I have all my photos stored in folders under the Amazon Drive folder. Just recently Amazon added a sync'ing capability so the cloud storage always reflects what's on your PC. You can chose not to sync which is a wise choice for my iPad since the cloud storage would quickly overwhelm the iPad's meager storage limit. However, anything I put into the iPad app will still automatically upload and later sync with my PC storage (I have a 5 terabyte drive there). Tip: Amazon Drive automatically loads itself onto Drive C: which you may not want since your largest capacity drive is probably a later add on like mine. Just open the Amazon download app, go to File Explorer and erase the Amazon Drive folder. You will get a popup screen asking where you want to put it. I selected my 5 terabyte G: drive.

My files are safe on Google Drive and my photos are safe on Prime Photos, all at no cost other than my membership on Amazon Prime which I would have anyway for free shipping (we buy a lot of stuff from them while traveling on the ICW, speed of delivery is important to us) and access to the video and music streaming.

Now it's time to move on to Christmas, we have a house full coming, 13 so far. It will be fun.


Sunday, December 18, 2016

Recovering programs after a crash when on a boat


Running InfraRecorder, select "to a Disc Image"
When I'm traveling on the ICW I use my iPad for about 90% of computing power on board and it has served me well. However, the remaining 10% is very important and consists of publishing the blog every night and occasional route planning. So it was very unsettling when my laptop died with a hard drive crash. That experience led to the previous article on how to recover from that disaster when isolated on a boat.

I now want to cover how to better prepare (than I did) for such an unsettling experience. Following the previous article, I now had my laptop up and running with the new hard drive but nothing was loaded except Windows 10. I had all my old passwords stored on my iPad so at least that was not a problem. I started loading programs:
- Email:  I just used the mail program which comes with Windows 10. It's not very pretty but it gets the job done.
- Browser: Win10 comes with window's Edge browser but I like Google Chrome, available for downloading (I used Edge for that first download)
- I signed into Google's Blogger site and I was up and running on my blog.
- Cloud Storage: I downloaded Google Drive and after sync'ing I could access all my old data, nothing was lost. I also had access via my iPad without interruption during the crash.
- I downloaded the latest Norton Security program and activated it with my Norton password.
- I downloaded Quicken (no charge for the download) and activated it with my Quicken password. Now I was reconnected to all my accounts although I already had access via my iPad.
- Next was a download of InfraView, a very useful free, photo editing program for about 95% of my photo editing needs (cropping, resolution reduction for the web, etc.)

After clicking "to a Disc Image" you get to name it and where to save it
At this point I started to run into trouble. I use Adobe CS4 for more advanced photo editing and that disk was at home in New York as were the disks for Microsoft Excel, Word, and Publisher. On the iPad I just use the Apple corresponding products of Numbers, Pages and Keynote (but not a Publisher counterpart). They work well on the iPad but I needed a PC solution. I've found the Microsoft Office 2000 versions of Excel and Word have more than enough power for my uses and they're paid for, no monthly fee like the new products. My copy of Adobe CS4 also has no monthly fee, a thing to be treasured.

I never found a way around the problem of not having the installation disks while on my boat. One option is to download Apache Open Office  as suggested by Fred Brillo with the same capabilities as the Microsoft Office suite and best of all it's free. All data can be exchanged to and from the Microsoft suite, the formats are fully compatible. However, if you still want to stick with your favorite office suite as I did, then I did find a solution and it may be of interest to those cruising in remote places when you suffer from a computer meltdown. Whether it's just a disk crash or a complete loss of your laptop, you will need those installation disks for your fix. I don't know if you've noticed or not but most new laptops do not come with a CD or DVD reader anymore. Luckily, you do not need one if you plan ahead. The solution is to read all installation disks you might need while at home on your desktop computer with a CD reader attached. Use InfraRecorder to transfer the contents of the disk to an ISO file. The program is free and does not contain malware or ads like many similar programs. Let's be clear on one point, this is perfectly legal since the programs are protected with product keys which you have to know to activate the programs. You're just making a more convenient format for installation on your laptop. If you don't know the program keys anymore (lost, forgot, etc.) then they can be recovered from a computer with the programs already installed, like your desktop at home. The best program to use is Belarc Advisor. It prints out a complete listing with product codes of everything stored on your computer and more. It is free and safe, no malware or viruses. Needless to say, store the output in a safe place. I put my copy in the cloud on my Google Drive where I can always access it.


To install a program, right click on the ISO file and select "Open with" and "Windows Explorer"
I then opened InfraRecorder and inserted the first installation disk, in my case I started with Microsoft Word. For each disk it will ask you to name it and where you want to store the resulting ISO file (that's the file type, e.g., xxxxx.iso). So I transferred Word, Excel, Publisher and Adobe CS4 as ISO files to my Google Drive which I can access anytime I have an internet connection. I can also just store the ISO files on a USB thumb drive if desired or on my iPad for easy access.

After right clicking on "Windows Explorer" you're presented with the disc contents. Click on an EXE file, either SETUP.EXE or INSTALL.EXE
Now comes the best part. Windows 10 can read an ISO file just as if a CD drive was reading the disk. The path to do this depends on whether or not you have another program as the default program to open ISO files. You won't see the option to Mount the ISO disk if you have another program as the default choice in Win10. To get around this, just right click on the ISO file you want to install and hover with the pointer over "Open with" and you will see a selection labeled "Windows Explorer". Left click on that option when the mouse pointer is over that option. Then double click on either Setup.exe or Install.exe, the choice differs between install programs. You can now proceed to do an install.

So the next time (hopefully never) I have a crash or lose my laptop, I can reload my Microsoft and Adobe programs from the ISO files stored in the cloud on my Google Drive just using Windows 10 as described above.

Sunday, December 4, 2016

Recovering from a disc crash while cruising

That 3 inside the "U" is all important!
If you remember my computer troubles, you'll recall that my hard drive crashed midway down the ICW. Diving into Windows 10 and in reviving my laptop led me to several revelations on the current state of Windows 10 and SD cards. Since the marine environment is more challenging than staying at home (how dull...) there may be interest on my learning experience so here goes.

First off I discovered that unlike all previous versions of Windows, Win10 does not automatically create a restore point. In all previous versions of Windows, the operating system would create a restore point whenever a major update was installed. If you've ever had a computer crash or a blue screen (Win won't come up) you always had the option of reverting to a previous time when everything worked. Well, in Win10 that option is not automatically set to "On". I found this out the hard way when I suspected my laptop problem was due to a corrupted file. I thought, OK, I'll just revert to a previous, saved restore point but I had none stored. Furthermore Win10 also disables the F8 option of getting the Win10 repair screen to come up. All of this was in an effort by Microsoft to save a couple of seconds in boot time.

Part 2, a fast USB 3.0 reader
So what to do? Since I could not access my hard drive I made a bootable SD card in a USB reader. Naturally I had no Win10 disk (it's at home in New York!) but I did have a high speed internet connection at various marinas along the way. The steps:
1 - Even though I could not access the hard drive, I could boot from a USB drive provided the bios allowed that option. All laptops have some option to bring up the bios screen before booting to windows. On my Lenovo I have a blue button to push, other laptops have F1 or Del to hit, the instruction is usually part of the boot screen. After bringing up the bios screen, be sure to set the option of allowing a Win10 boot from a USB drive and put that option first in the sequence of booting.
2 - Now you need both a high speed USB 3.0 card reader and a 32 GB high speed SD card. See the links for details. There are bunches and bunches of SD cards with a confusing array of labels but there is only one label that matters. Look for a "3" in a "U". That denotes a high speed write capability. I didn't know all this stuff until I bought what I thought was a high speed card advertised at "80MB/sec" only to find out that it was very slow in write speed, it was not rated with a 1 or 3 in the "U", in fact the "U" rating was not even shown on the card. If you want to know more than you ever really wanted to know, just go here.
3 - Now you need a copy of Win10. Luckily, Microsoft provides one free for the download. They will want you to input a product key, just ignore it and proceed, it will work if your computer previously had Win10 loaded. Unfortunately for me, the download requires a Win7 or higher laptop which I did not have. I did have an old XP laptop and I won't go through the hoops I needed to jump through for that download to work, many hours. I finally used Rufus, a free tool that works with XP systems.
4 - Now plug in your Win10 copy in a USB 3.0 port (blue, not black) and Win10 comes up. You can start using you laptop at this point.

WD Black, what you want
I went further and bought another hard disk, A Western Digital 500 GB 2.5 inch drive. I removed the old drive (6 screws, easy) and slipped in the new drive. and rebooted with the USB drive still inserted with my new copy of Win10. Upon booting, I chose to install Win10 on the new drive from the inserted USB drive with the copy of Win10.

All drives were set to  "Off" at first
I then removed the USB drive and rebooted the laptop. I now had a functional laptop again with Win10. My first step was to save a restore point! To do so, went to Settings (left, bottom 4 pane icon and select Settings) and enter Restore in the search pane, then choose "Create a Restore Point". Turn on protection for your hard drives and click on "Create a restore point right now..."

But that's now enough. You also have to turn on the option to allow F8 to bring up the restore screen (if you can't get into windows). Look here for details on how to do that. With the last step you can now get to the restore screen (or repair, lots of options) upon booting. You'll have to sit there and pound away at F8 constantly to find the short window when the laptop will respond to the F8 command during the boot up cycle, but it will work (you may have to reboot several times to hit that narrow window of opportunity).

Just slip the old drive into this case
Now that I had a functioning Win10 computer, I put my old drive into a USB drive caddy, I used the
ORICO USB 3.0 External Enclosure. Inserting the USB drive enclosure into the blue (USB 3.0) port I found that my old drive came alive. So the old drive wasn't dead after all. There must be some corrupt system file preventing booting, I'm still working on that. I did not need the drive for old data since all my personal files are stored in the cloud, namely Google Drive which is free for the first 15 GB. It's plenty for all files except photos which I store in the cloud service, PrimePhotos. If you belong to Amazon Prime, which I do, the photo storage space is unlimited.

All this was happening in the background while I was doing my blog. I used my iPad at first until I got my laptop running again. The blog is much easier to do on the laptop but I can use the iPad in a pinch.

Meanwhile, it's really cold up here!! We arrived to 25 degree weather and 20 kts of wind, cold, cold, cold. Of course, I must have been used to it in the past. Ann and I have skied in much colder weather in Colorado but since then our blood has thinned. We much prefer warmer weather. Our plan is to return to Titusville on January 3rd and resume the blog on the 4th. Hopefully Finn, grandchild number three, will be with us for the trip to Key West.